If you’ve ever noticed white spots on your clean glasses, stiff laundry, or soap that just doesn’t seem to lather well, you might be dealing with hard water. It’s one of those quiet household annoyances that sneaks up on you — until your showerhead starts clogging and your skin feels drier than usual. But before you can fix the problem, you’ve got to figure out how to test for hard water in the first place.
Let’s take a closer look at what hard water actually is, how you can check if it’s affecting your home, and what simple tools or tricks can help you get clear answers.
What Does “Hard Water” Even Mean?
Hard water is basically water with a high concentration of dissolved minerals — mostly calcium and magnesium. These minerals aren’t harmful to your health, but they can wreak havoc on your plumbing, appliances, and even your hair. Think of it as mineral buildup that you can’t always see right away but definitely feel over time.
When hard water flows through pipes, it leaves behind deposits, much like how boiling water leaves scale inside a kettle. Over time, these deposits can narrow pipes, reduce water pressure, and make your heating systems less efficient. Not to mention, they can make your soaps and detergents perform poorly, leaving behind that annoying film on your dishes and faucets.
Why You Should Care About Testing
Many people ignore the signs of hard water because it’s not an immediate danger — it’s more of a slow burn. But the truth is, over time, untreated hard water can shorten the lifespan of your water heater, dishwasher, and washing machine. It can even lead to higher energy bills since your appliances have to work harder to overcome the buildup.
If you’ve been noticing chalky residue on your taps, dull laundry, or your skin feeling tighter after a shower, those are your cues to start testing. The sooner you know what you’re dealing with, the easier it becomes to choose the right filtration or softening solution.
How to Tell the Signs on Your Own
Before you run out and buy a test kit, you can actually do a few quick DIY checks. Start with the soap test. Fill a bottle halfway with tap water, add a few drops of liquid soap (the kind without added detergents), and shake it up.
If the water turns cloudy or doesn’t form a nice layer of suds, that’s a strong indicator you’ve got hard water. Soft water, by contrast, will produce plenty of foam and appear clear. It’s not a lab result, but it’s a quick first step that can tell you if something’s off.
Another clue: look at your fixtures. White spots on chrome taps, dull shower doors, or a rough, scaly feel on bathroom tiles all point toward hardness.
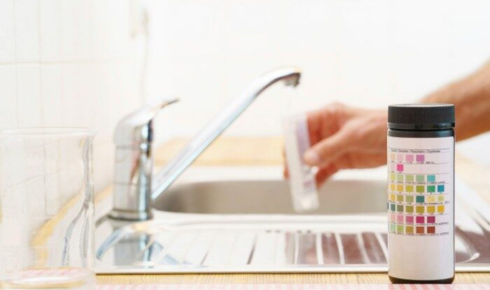
Getting More Precise: Testing Kits and Meters
If you want a more exact measurement, you can pick up a water hardness test kit online or at a home improvement store. These kits usually come with test strips or reagents that react to minerals in the water. Dip the strip into a glass of tap water and compare the color change to the chart that comes with it — simple and effective.
Digital meters are another handy option. They measure the total dissolved solids (TDS) in your water, giving you a number that reflects how mineral-heavy it is. While TDS meters aren’t as specific as hardness-only tests, they’re a good way to monitor general water quality.
For those who like a hands-on approach, testing can become almost addictive — like checking your soil pH if you’re into gardening. You might even find yourself comparing results from the kitchen, bathroom, and outdoor tap, just to see how they differ.
Understanding the Numbers
When you perform a test water hardness check, you’ll likely see results measured in parts per million (ppm) or grains per gallon (gpg). Here’s a quick breakdown:
- 0–60 ppm (0–3.5 gpg): Soft water
- 61–120 ppm (3.6–7.0 gpg): Moderately hard water
- 121–180 ppm (7.1–10.5 gpg): Hard water
- Over 180 ppm (10.6+ gpg): Very hard water
So, if your reading falls on the higher end, you might want to start considering a softening solution before the mineral buildup becomes a costly problem.
Professional Testing: When DIY Isn’t Enough
Sometimes, especially if your home relies on well water, a store-bought kit might not tell the full story. In those cases, hiring a professional to analyze your water is worth it. They can provide a detailed report that breaks down not just hardness, but also pH levels, iron, chlorine, and other elements.
Knowing how to test how hard your water is accurately can also help you make smarter buying decisions. For instance, if you’re investing in a water softener or filtration system, you’ll want to know your baseline hardness level so the system can be sized and programmed properly.
Professionals use calibrated equipment that provides results within precise ranges — something at-home kits can’t always match. Think of it as getting your water’s “blood test.”
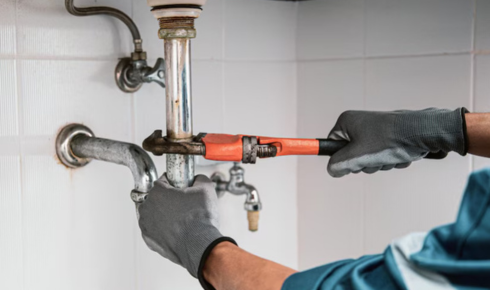
The Fix: What to Do Once You Know
If your water is on the harder side, don’t panic. Solutions range from simple filters to full-scale softening systems. For light to moderate hardness, a cartridge-style filter or reverse osmosis unit might be enough. For more severe hardness, you’ll likely need a salt-based or salt-free softener to keep the buildup under control.
You’ll notice the difference within days — softer laundry, easier cleaning, and that silky smooth feeling on your skin after a shower. And if you’ve been fighting off cloudy dishes or coffee maker scale, that’ll start to fade too.
Final Thoughts
Learning how to test for hard water isn’t just about curiosity — it’s about protecting your home’s plumbing, your appliances, and even your comfort. Water might seem like a simple thing, but its quality can quietly impact everything from your morning coffee to your energy bills.
Take an hour this weekend to test your water and see where you stand. You might be surprised by what you find — and relieved to finally have an explanation for those stubborn white spots on your sink. With a little testing and the right solution, clear, soft water isn’t a luxury. It’s entirely within reach.